Survey Manager
The Survey Manager allows a project team to create surveys. Providing a survey service in an environment where most services are related to software development activities may seem a bit strange at first glance. However if you remember that Tuleap is about source code sharing and community building, you’ll soon realize that part of the game in building a strong community is to listen to the community feedback and make it happy.
Listening to your community can be done in various ways on Tuleap:
- through your project mailing lists and web forums,
- from the feedback received when you post a piece of news on your Project Dashboard
- or by analyzing the profile of the submitted Support Requests over a period of time.
All these communication channels allow Tuleap users to push spontaneous feedback on a topic that they wholeheartedly cherish. But what if you want to collect the opinion of your community on a precise number of subjects and you want the answers to be taken from a set of possible choices defined by the project team? This is precisely what the Survey Manager is for. It allows you to:
- formulate a precise a list of questions
- define the set of possible answers for easy statistical analysis
- make the survey accessible to virtually anybody via the Intranet
- review the results to identify the dominant trends in your community of users.
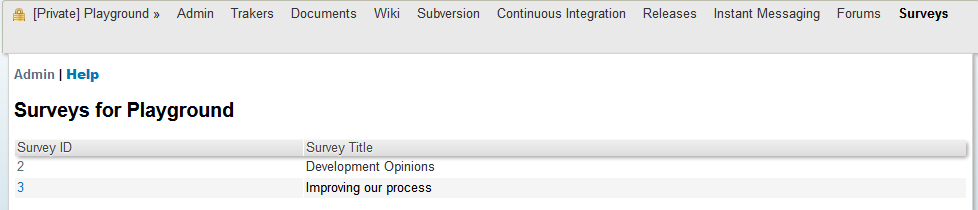
Survey Manager Welcome screen
Publishing a Survey
Audience: project members
You have been working hard to produce this perfectly polished survey and now you want to reach the broadest possible audience. With Tuleap you can make your survey visible in a number of ways:
Through the Survey Manager itself: as soon as a survey is created it is visible in your Survey Manager Welcome screen (see Survey Manager Welcome screen). So any Tuleap user visiting your Project Dashboard will see that surveys are available in the “Public Area” (survey count not null) and by clicking on “Surveys” she will be able to take whatever survey is available.
Project News Service: when you have your new survey ready, make sure you publish a piece of news about this survey: why you did it, who is expected to take it and type the Web location corresponding to the survey (see below). By publishing a piece of news you also have a chance to see it on the Tuleap front page if the Tuleap Team decides so.
E-mail: the survey you have created can be accessed directly via a Web pointer (URL) on the Tuleap site. As a consequence you can push your survey to virtually anybody in the Corporation simply by referencing the survey Web pointer in an e-mail message, a web page or any kind of office document. Even non Tuleap Users will be able to take the survey.
All surveys created on Tuleap can be accessed through the following Web pointer (URL):
http://tuleap.example.com/survey/survey.php?group_id=N&survey_id=X
where N is your project ID number and X is the survey ID number as shown in the survey list displayed on the Survey Manager welcome screen. Your project ID number N is visible on the Survey Manager Administration screen (see Survey Manager Welcome screen)
Taking a survey is just a matter of accessing the survey by one of the previously mentioned method, answer the questions and click on the “Submit” button at the bottom of the page. A sample survey is shown on A sample survey taken from the Tuleap project.
Tip
The information collected in these surveys are strictly internal to SYS_ORG_NAME. This information is being gathered to build a profile of the projects and developers being surveyed. The identity of those who answer surveys are suppressed and not viewable by project administrators or the public or third parties. The information gathered is used only in aggregate form, not to single out specific users or developers.
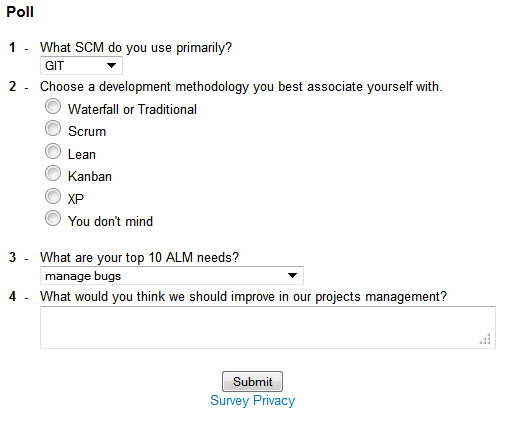
A sample survey taken from the Tuleap project
Administering Surveys
Audience: project members
Administrative functions of the Survey Manager can only be used by the project members. The Administration module allows you to:
- Create or modify a survey
- Create or modify questions
- Review the survey results
To access administrative functions of the Survey , go to your Project Dashboard and click on the “Survey” item in the Project Main menu at the top of the screen, then select the “Admin” item in the Survey Manager menu (see Survey Manager Welcome screen). From there you have access to all the Survey Administrative functions (see Survey Manager Administration screen).
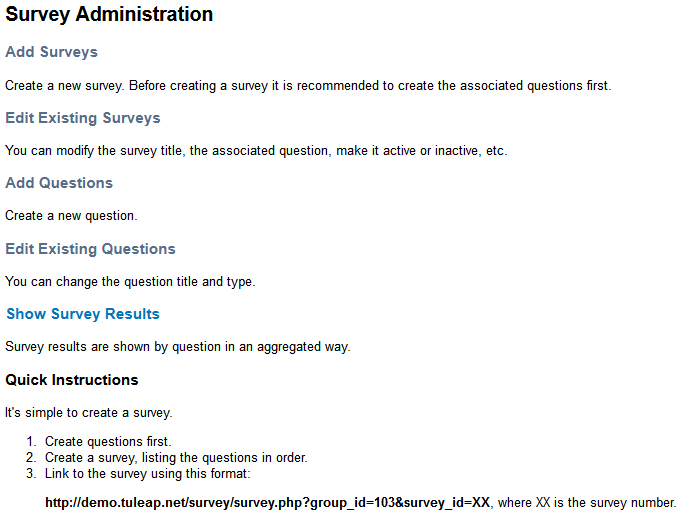
Survey Manager Administration screen
Survey Structure
In order to understand the survey creation and update process you must first understand that the Survey module manages two distinct pools of entities: a pool of surveys and a pool of questions. As a consequence of this organization, creating a survey is a 2-step process:
First you create a set of questions along with the related set of possible answers. All questions for all surveys are stored in a common pool.
Then you create a survey mostly by giving it a title and attaching a series of previously defined questions to it.
One of the interest of managing questions and surveys separately is that you can create distinct surveys and re-use the same questions in several of them if need be.
Creating or Editing Questions
First thing first: if you want to collect people’s opinion you must first define a set of questions and the possible answers for each of them. Designing a good survey is not an easy task and it requires a fair amount of work: the value derived from the survey results depends directly on the quality of your questions. A couple of advices: do not put too many questions in a survey, questions must be short, clear, unambiguous and non overlapping. So take some time to think about it with your project team.
To create questions click on the “Add Questions” item either in the Survey Manager Administration menu or in the content of the page itself. Defining a question is simply a matter of typing the question itself and then choosing a response type. There are 5 types of possible responses (see A sample survey taken from the Tuleap project for some sample questions):
- Radio Buttons 1-5: this response type will force the user to give an answer to the question on a scale from 1 to 5 using 5 radio buttons.
- Radio Buttons Yes/No: this is a variant of the previous one for questions calling for a Yes or No answer.
- Custom Radio Buttons: this response type allows the project administrator to define a set of answers from which the user may choose one. The possible answers are displayed as radio buttons.
- Select Box: this response type allows the project administrator to define a set of answers from which the user may choose one. The possible answers are displayed in a select box.
- Text Field: questions for which you want a short free text answer (one line)
- Text Area: same as above but the user can enter multiple lines of text. This is when you want to have a detailed answer to the question
- Comment: this is not really a question. It’s a convenient way to insert comments in your list of questions.
- None: Assigning this type to a question will result in the de-activation of the question. This question will disappear from all the surveys using it. As usual in Tuleap the question is not deleted and all the answers collected so far in the various survey where this question is used remain untouched.
At any moment in the creation phase you can display the list of existing questions by clicking on the “Show Existing Questions” button at the bottom of the screen
Editing questions is also possible. To do so, click on the “Edit Existing Questions” item in the Survey Manager Administration menu or in the content of the page itself (see Survey Manager Administration screen). You are then presented with the list of questions that are currently available in your question pool. Clicking on the question identifier number in the leftmost column allows you to change the question properties.
Remark: changing a question after responses have already been collected is a bad idea especially when changing the question type. In this case collected data will become inconsistent with the new question type. On the other hand, correcting a typo in the question or making the question clearer is perfectly OK and doesn’t impact the existing set of answers.
Creating or Editing a Survey
Once you have created questions in the common question pool, you can create a survey and attach questions to it.
To create a survey click on the “Add Surveys” item either in the Survey Manager Administration menu or in the content of the page itself (see Survey Manager Administration screen). Then enter the following information:
- The name of the survey (give it a short title)
- The list of questions attached to the survey. This is a comma separated list of question identifiers (IDs) that you want to use for this survey. To see question IDs in a separate window, click on the “Show Existing Questions” and choose the appropriate question IDs from the list. The questions will appear in the survey in the same order as in the list.
- The status of the survey: you can make it active or not. As long as a survey is inactive it doesn’t show up in the welcome screen of the Survey Manager meaning that it is not visible to Tuleap users. Similarly accessing the survey directly via its Web location will not work either.
- If you allow anonymous answer or not. Allowing anonymous answers give the opportunity to unregistered people (or not-logged ones) to answer the survey. If you don’t allow anonymous answers, only registered (and logged in) users will be able to answer the survey.
At the bottom of the screen is a list of all the surveys defined for your project. You can edit any of the survey by clicking on the survey ID in the leftmost column. Editing a survey can be also be done by clicking on the “Edit Existing Surveys” item in the Survey Manager Administration menu and then choosing the survey to edit at the bottom of the screen. While editing a survey you can change the list of questions or the order of the questions without impacting the current result set. If you remove a question from the survey, you won’t be able to view the existing set of responses. However it does not mean they are lost. Re-inserting the question ID in the survey list allows you to view the set of responses again (see next section).
Reviewing Survey Results
Audience: project members
At any point in the life of the survey, project members can have a look at the existing set of answers that have already been given by the users who took the survey. To review the results of a given survey click on the “Show Results” item in the Survey Manager Administration menu and then click on the Survey ID number you are interested in.
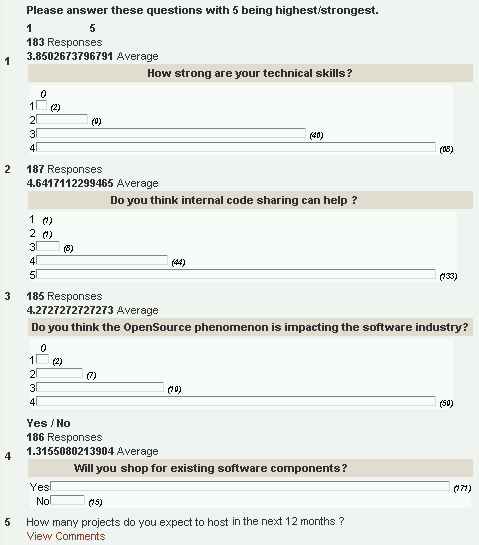
Survey Results
A list of all the questions attached to this survey will show up on the screen. Next to each question is an aggregate view of the existing answers. For questions of type “text field” or “text area” you can review the full list of answers. For radio buttons, the Survey Manager compute the total number of answers, the average value as well as the value distribution for radio button answers.
Tip
If you want to further massage the results of your surveys remember that Tuleap allows project administrators to export project data including survey results. For more details see Project Data Export